Timothy,
To get consistent results you will need to do some experimentation with developers, paper types, exposure durations, and agitation.
The solariazation I think you are talking about it called the Sabattier effect. It is caused by the build up of waste products along transition areas from light to dark. After partial development the print is re-exposed to the light with the waste products limiting the light that hits the paper in those areas causing a white halo effect. These white areas are called Mackey Lines, (pardon my spelling) In the rest of the print the white areas of the print turn to a grey color or are darkend substantially depending on exposure. This gives you the negative look you are attempting to get.
Some thing I have found over the years is that you develop the print with little or no agitation so that you do not disturb the waste products that are built up on the emulsion.
Next would be to pull the print out of the developer carefully and place it on a sheet of glass or some other flat surface. Place it back under the enlarger (no neg in carrier) at a set enlargement size, in focus, and with a set aperture. It is important to note the height of the enlarger, and make sure that it is in focus so that the light will be consistent on future attempts, as the light intensity hitting the paper will change based on the magnification and bellows extention.
Once the print is back under the enlarger you can then make a stepped test print, exposing it to the white light in increments of your choosing, I use 3 second steps.
After exposure, place the paper back into the developer and process for a set period of time. The key to good prints is to get rid of the variables, so if you develop for a fixed time of say 2 minutes, the only variable would be the exposure time and you will be able to re-create the effect with good results. Look at the test print and find the correct re-exposure time. Then make the final print using the same setup.
There used to be a developer called Solarol that was specifically designed to produce high amounts of waste material thus making the process easier. I am not sure if it is sold any more, but it would be a good choice if you can find it.
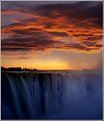
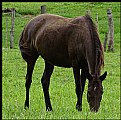
Attached is one of my first attempts at solarization made many years ago when I was 14 years old. Sometimes you luck out. I was not as careful then, as you can see the chemical lines and some finger prints etc. But it is a fun process.
Have fun and post some of your results, would be interested in seeing how you did.
|


![Photograph By Nelson Moore [Kes] - Photograph By Nelson Moore [Kes] -](http://thumbs.imageopolis.com/images/6/0/0/5/6005/1537290-tn.jpg)


![Photograph By Nelson Moore [Kes] - Photograph By Nelson Moore [Kes] -](http://thumbs.imageopolis.com/images/6/0/0/5/6005/1537290-tn.jpg)
